ShopMarch 9, 2026
-
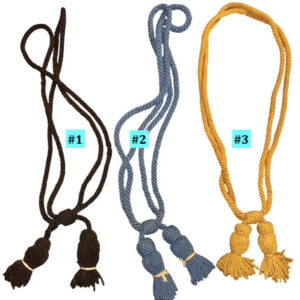
Original Civil War Period Worsted Wool Hardee Hat Cords
Original Civil War Period Worsted Wool Hardee Hat CordsMarch 9, 2026 -
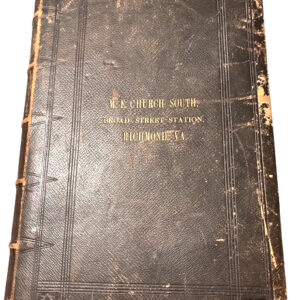
Richmond Antebellum Period M. E. Church South Bible Positioned in the R, F & P Railroad Station on Broad Street
$450Richmond Antebellum Period M. E. Church South Bible Positioned in the R, F & P Railroad Station on Broad StreetMarch 7, 2026 -
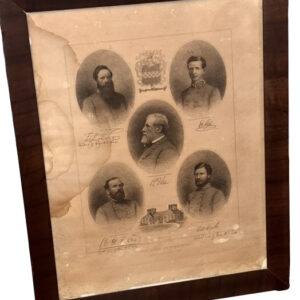
Rare C. 1898 Lithograph of Virginia’s Lee Family Participants in the Confederate Army in its Original Frame Behind Original Glass
$350Rare C. 1898 Lithograph of Virginia’s Lee Family Participants in the Confederate Army in its Original Frame Behind Original GlassMarch 6, 2026 -
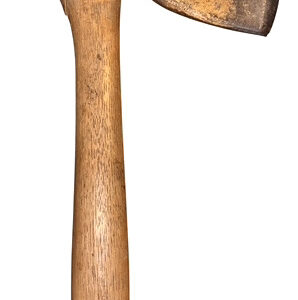
Civil War Broad Axe Issued to the United States Military Railroad
$450Civil War Broad Axe Issued to the United States Military RailroadMarch 5, 2026 -
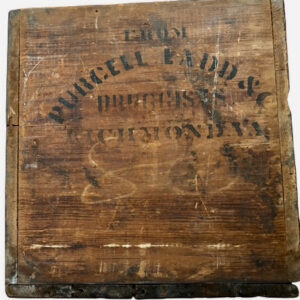
Mid-19th Century Wood Crate Used by Richmond Apothecary Company Purcell Ladd & Company
$325Mid-19th Century Wood Crate Used by Richmond Apothecary Company Purcell Ladd & CompanyMarch 4, 2026 -
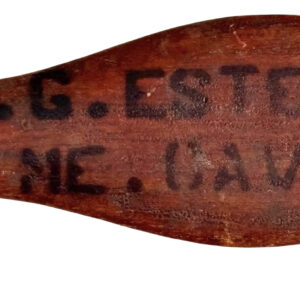
Civil War Razor and Razor Strop of Brevet Gen. Llewellyn G. Estes Co. A 1st Maine Cavalry, Adj. US Vols Adjutant General’s Dept., Medal of Honor Recipient
$750Civil War Razor and Razor Strop of Brevet Gen. Llewellyn G. Estes Co. A 1st Maine Cavalry, Adj. US Vols Adjutant General’s Dept., Medal of Honor RecipientFebruary 23, 2026 -
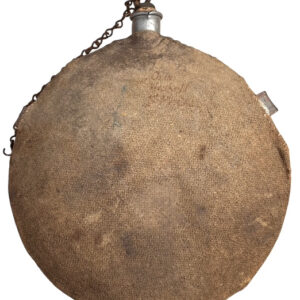
Id’d M1858 Smooth Side Canteen and Spurs of Lt. Orin S. Haskell Co. A 1st Maine Cavalry
$1,150Id’d M1858 Smooth Side Canteen and Spurs of Lt. Orin S. Haskell Co. A 1st Maine CavalryFebruary 23, 2026 -
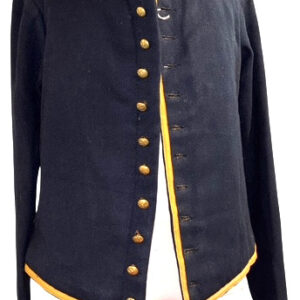
Original Civil War Federal Issue Cavalry Shell Jacket in Near Unissued Condition
$2,650Original Civil War Federal Issue Cavalry Shell Jacket in Near Unissued ConditionFebruary 22, 2026 -
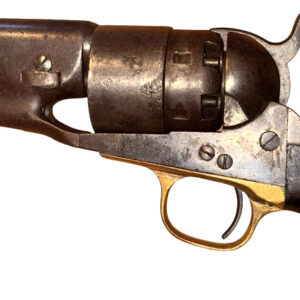
Civil War Period Colt Model 1860 Army Revolver
$2,650Civil War Period Colt Model 1860 Army RevolverFebruary 19, 2026 -
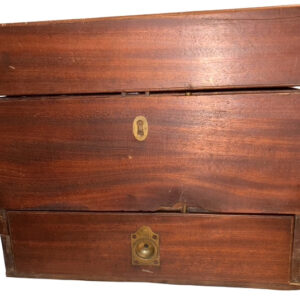
C. 1840 – 1855 Petersburg, Virginia Apothecary Chest
$1,650C. 1840 – 1855 Petersburg, Virginia Apothecary ChestFebruary 19, 2026 -
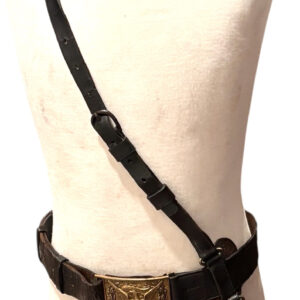
Civil War Officer’s Sword Belt Retaining its Original Shoulder Strap – Embossed Belt Safe Indicating Belt Made by Bent & Bush of Boston
$1,250Civil War Officer’s Sword Belt Retaining its Original Shoulder Strap – Embossed Belt Safe Indicating Belt Made by Bent & Bush of BostonFebruary 18, 2026 -
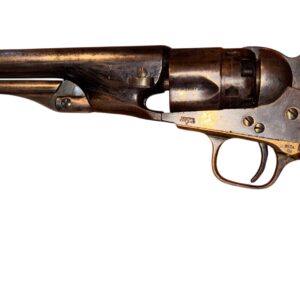
Colt M1862 Police Revolver
$2,650Colt M1862 Police RevolverFebruary 17, 2026 -
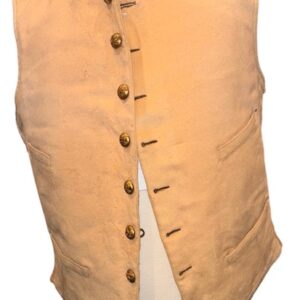
Id’d Civil War Buff Officer’s Vest, Gauntlets and Reunion Ribbons of Capt. Maurice Leyden Co. B 3rd NY Cavalry
$2,250Id’d Civil War Buff Officer’s Vest, Gauntlets and Reunion Ribbons of Capt. Maurice Leyden Co. B 3rd NY CavalryFebruary 16, 2026 -
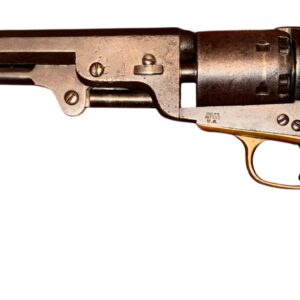
M1851 Martially Marked Colt Navy Revolver
$2,750M1851 Martially Marked Colt Navy RevolverFebruary 15, 2026 -
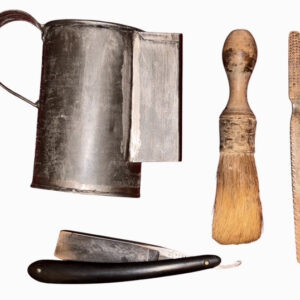
Civil War Period Shaving Items and Toothbrush
$375Civil War Period Shaving Items and ToothbrushFebruary 4, 2026 -
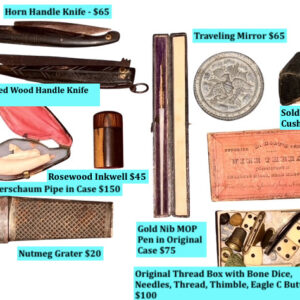
Group of Civil War Period Personal Items
Group of Civil War Period Personal ItemsFebruary 3, 2026 -
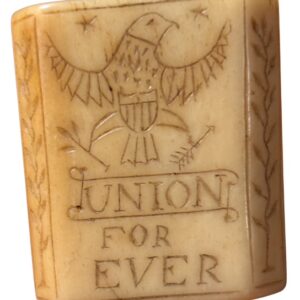
Patriotic Motif Civil War Soldier Carved Bone Cravat or Neckerchief Slide
Patriotic Motif Civil War Soldier Carved Bone Cravat or Neckerchief SlideFebruary 2, 2026 -
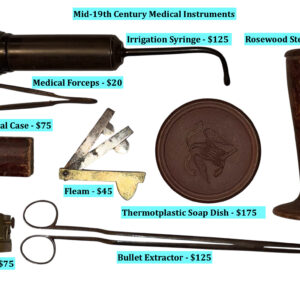
Group of 19th Century, Civil War Period Medical Instruments
Group of 19th Century, Civil War Period Medical InstrumentsFebruary 2, 2026 -
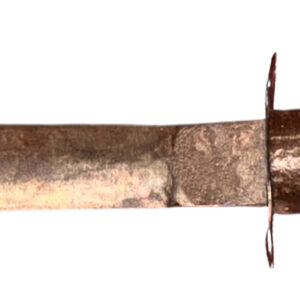
Confederate Side Knife
$650Confederate Side KnifeFebruary 1, 2026 -
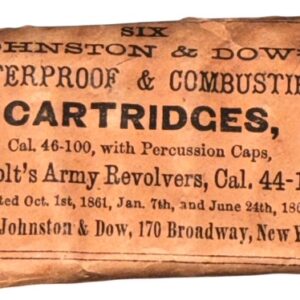
Original Unopened Pack of .44 Caliber Cartridges Made by Johnston & Dow for the M1860 Colt Army Revolver
$425Original Unopened Pack of .44 Caliber Cartridges Made by Johnston & Dow for the M1860 Colt Army RevolverFebruary 1, 2026
